Adjust or Replace Treadmill Walking Belt, Everything You Need to Know
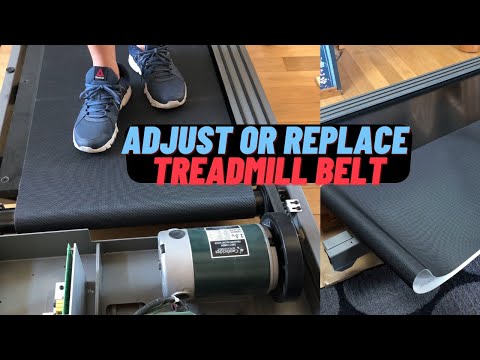
Adjust or Replace Treadmill Walking Belt, Everything You Need to Know
Key Takeaways
- It is important to adjust a treadmill walking belt when it is needed because if you don’t there are likely to be some bad consequences, such as increasing wear and tear on the belt or motor or worse
- For example if you start to notice your treadmill belt shifting to one side, then you’ll need to switch the treadmill off immediately, otherwise you may end up with a problem like the one you see here
- We will show you how to make adjustments so that the belt is centered and what are the best practices
- We will also show you how to replace the treadmill belt (very detailed step-by-step guide)
- Your treadmill may be a little different than the one shown here, however the principles are the same
Understanding the Basics
The walking belt runs on two rollers: the front roller (driven by the motor) and the rear roller (adjustable for tension and alignment). Belt tension is controlled by two bolts at the rear of the treadmill — tightening them increases tension and also adjusts left-right alignment. If the belt drifts to the right, slightly tightening the right rear bolt pulls it back to center. The walking belt guide is a small component between the rollers that helps keep the belt centered. Many repair guides omit this part, but it plays an essential role in preventing belt drift.
The DIY Advantage
A treadmill repair service call costs $100 to $200 for the visit plus parts. A replacement walking belt costs $30 to $80 online. The adjustment process requires only an Allen wrench and costs nothing.
Tips for Best Results
When adjusting belt tension, make small turns (quarter-turn increments) and write down how many turns you make so you can reverse the adjustment if needed. If the belt needs replacement, photograph the disassembly process so you have a reference for reassembly. When installing a new belt, make sure the walking belt guide is correctly positioned — an incorrectly seated guide causes rapid belt wear. After reassembly, check belt centering at low speed before running at full speed.
Video Chapter Guide
Here is a quick reference for the key sections covered in the video:
- 0:00 adjust belt overview
- 0:37 adjust belt tension (rear roller)
- 1:22 belt too loose
- 1:49 two tips for belt adjustment: count & write down turns
- 2:34 replace belt, remove front cover
- 2:54 remove front right roller bolt
- 3:19 remove end cap
- 3:39 DIY short screwdriver
- 4:18 remove side rail
- 4:41 remove screws on deck
- 5:01 optional remove left bolt
- 5:46 tie rope deck, roller & waist
Use these timestamps to jump directly to the section most relevant to your situation.
More Practical Guides
Regular belt adjustment and maintenance keeps your treadmill running smoothly for years and avoids the expense of premature belt or motor replacement.
For more hands-on tutorials, check out our guides on bathtub caulking and peeling garlic easily without special tools. Each one follows the same practical, no-nonsense approach to help you save money and build useful skills.