How To Clean Install Windows 7
How to Clean Install Windows 7 on a Laptop or PC
Key Takeaways
- A clean install of Windows 7 wipes the drive and starts fresh, removing all bloatware and accumulated problems
- You can legally reinstall Windows 7 using your existing license key without any additional cost
- There are two main scenarios: removing bloatware from a new laptop or recovering from a hard disk failure
- The process is straightforward but requires preparation — back up your data before starting
- Following the step-by-step guide makes the process accessible even for non-technical users
What This Video Shows
Whether you just bought a new laptop loaded with manufacturer bloatware or your hard disk died and needs a fresh start, a clean install of Windows 7 gives you a pristine operating system without the junk. This video walks through the entire process step by step, showing you how to do it legally and at no additional cost.
While Windows 7 is no longer the current version of Windows, the principles of performing a clean OS installation remain relevant. The process teaches you about boot media creation, BIOS settings, disk partitioning, and driver installation — skills that transfer to any operating system installation.
Why Clean Install
A clean install differs from a factory reset in an important way. Factory resets on laptops typically restore the system to the manufacturer’s original state, complete with all the pre-installed software you never asked for. A clean install starts with just Windows and nothing else.
Benefits of a clean install:
- Faster performance — no background processes from unwanted software
- More disk space — no trial software or manufacturer utilities consuming storage
- Cleaner system — no registry entries from pre-installed software
- Known state — you know exactly what is on your computer
The Process Overview
- Gather your license key — find the Windows 7 product key (usually on a sticker on the laptop or in the documentation)
- Create bootable installation media — either a USB drive or DVD with the Windows 7 installer
- Back up your data — a clean install erases everything on the drive
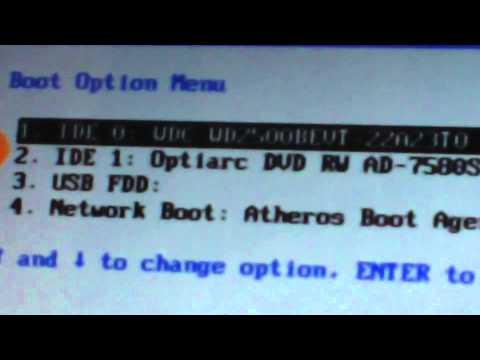
- Boot from the installation media — change the BIOS boot order to start from USB or DVD
- Follow the installer — select language, accept the license, choose “Custom” installation
- Format the drive — delete existing partitions and create new ones
- Install Windows — the installer handles the rest
- Install drivers — download and install drivers for your specific hardware
- Install updates — Windows Update will have many updates to download
Important Tips
Always back up your data before a clean install. Once you format the drive, everything on it is gone permanently. Keep your license key in a safe place — you will need it during installation and potentially for future reinstalls.