Big Mystery of the Adjustable Toilet Flapper Solved
Big Mystery of the Adjustable Toilet Flapper Solved
Key Takeaways
- This big mystery puzzled me for weeks
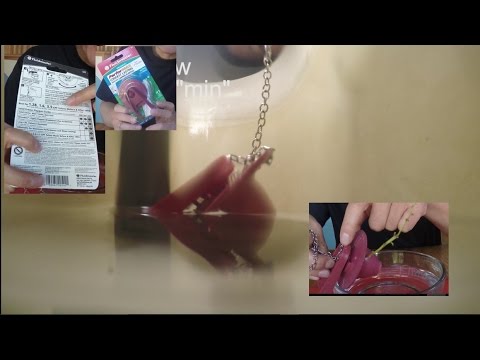
- I bought an adjustable flapper ($5 Universal PerforMAX High Performance Toilet Flapper water saving flapper)
- It has an adjustable dial for a customized water use per flush
- But I can’t figure out why it should work
- It looks symmetrical when adjusted from min to max
Understanding the Basics
An adjustable flapper has a dial (usually numbered 1 through 9) that is supposed to control how much water is released per flush. The confusing part is that the flapper appears perfectly symmetrical at every dial setting — so how can turning a dial that does not visibly change anything actually affect the flush volume? The answer lies in a small air pocket trapped inside the flapper. The dial adjusts a tiny vent that controls how quickly air escapes from the flapper’s float chamber. More air retention means the flapper stays open longer (more water per flush). Less air retention means it closes sooner (less water). The flapper itself is buoyant, and the trapped air is what keeps it open.
The DIY Advantage
A toilet that uses too much water per flush wastes thousands of gallons per year. At typical water rates, this can add $50 to $100 or more to your annual water bill. Understanding how the adjustable flapper works lets you dial in the minimum effective flush volume for your specific toilet.
Tips for Best Results
Start at the minimum setting and increase gradually until flushes are effective. Each toilet model has different bowl geometry, so the optimal setting varies. Once you understand the air-pocket principle, you can even convert a non-adjustable flapper into an adjustable one by modifying the buoyancy characteristics.
More Practical Guides
Understanding the science behind everyday plumbing fixtures empowers you to optimize your water usage and troubleshoot problems confidently. For more hands-on tutorials, check out our guides on bathtub caulking and peeling garlic easily without special tools. Each one follows the same practical, no-nonsense approach to help you save money and build useful skills.