Efficient & Quick Laminate/Engineered Wood Installation: 4 Step Minimal Plank Waste, and Save Time
Efficient & Quick Laminate/Engineered Wood Installation: 4 Step Minimal Plank Waste, and Save Time
Key Takeaways
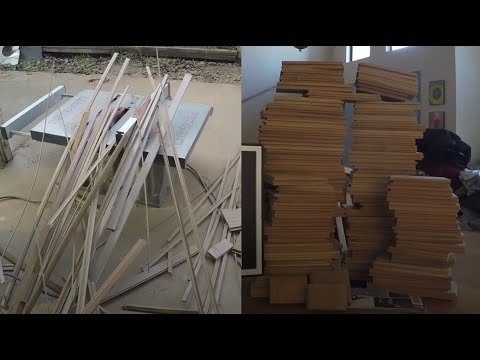
- How can you have almost zero waste when you install laminate or engineered wood flooring
- How about saving the time
- With my algorithm, you will never ever make any mistakes and never have to remove any planks, never have to re-do it
- The laminate flooring salespeople recommend allowing for at least 5% waste
- Still, when I installed the flooring from left to right, often I found the right plank was too short and I had to undo the whole row and start all over again (wasting time)
Understanding the Basics
Laminate and engineered wood planks come in uniform lengths, and the installation challenge is managing how the cut pieces at the end of each row relate to the next row. If you install left to right without planning, you often end up with a right-end piece that is too short, forcing you to undo the entire row. The solution is a 4-step planning algorithm that predicts the layout of every row before you start cutting, ensuring each piece meets the minimum length requirement (typically 8 inches) and no material is wasted.
The DIY Advantage
Laminate flooring material costs $1 to $5 per square foot. Five percent waste on a 500-square-foot room means 25 extra square feet of material — potentially $25 to $125 wasted. Professional installation adds $3 to $10 per square foot in labor. DIY installation with a zero-waste approach maximizes your savings.
Tips for Best Results
Before starting, measure the room and calculate the layout on paper using the algorithm. Make a cardboard template that equals the custom length (room width minus a plank) for quick one-second comparisons during installation. Stagger the joints between rows by at least 8 inches for structural integrity and appearance. If installing glueless click-lock planks, use the three-tapping method to properly engage both the primary and secondary tongue-and-groove locks.
Video Chapter Guide
Here is a quick reference for the key sections covered in the video:
- 0:00 laminate planks are uniform in length
- 0:25 almost zero planks waste
- 0:45 predict layout: saved materials
- 1:05 wrong way: left end too short
- 1:25 wrong way: right end too short: waste time
- 1:45 save money and save time correct way
- 2:09 all planks same length; longer than 8 inches
- 2:29 4 easy steps
- 2:53 standard length vs custom length
- 3:22 repeat for each room
- 3:43 step 2: make a template
- 4:26 step 3: if left greater than 8 inches
Use these timestamps to jump directly to the section most relevant to your situation.
More Practical Guides
Planning your laminate installation before cutting a single plank saves both materials and the frustration of having to redo work.
For more hands-on tutorials, check out our guides on bathtub caulking and peeling garlic easily without special tools. Each one follows the same practical, no-nonsense approach to help you save money and build useful skills.