Five ways to tear packing tape without any tools
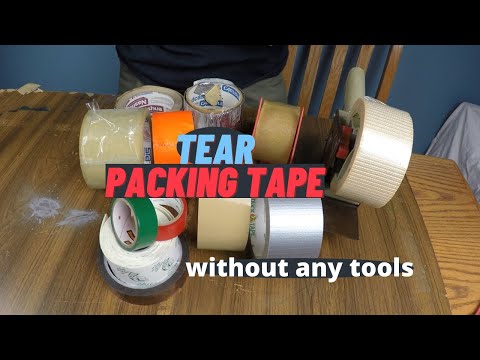
Five Ways to Tear Packing Tape Without Any Tools
You have probably tried to tear packing tape with your bare hands and failed spectacularly. The more you struggle, the more the tape stretches and refuses to break cleanly. It is especially embarrassing when friends are watching. In this video, Dr. David Zhang demonstrates five different methods for tearing packing tape without any tools, explaining the precise steps and conditions for each technique.
Understanding Why Tape Resists Tearing
Packing tape is designed to resist tearing. The plastic film stretches rather than breaking when you pull it. The key to tearing it is to create a stress concentration point — a small nick or fold that initiates the tear, then applying force perpendicular to the tape at that point.
The Five Methods
Each method creates the initial stress point differently. Some work better on certain tape types than others, so Dr. Zhang demonstrates conditions where each technique excels. The methods range from using a quick twisting motion to create a tear initiation point, to folding the tape back on itself to create a weak point, to using the edge of a surface to score the tape.
The most reliable method involves a specific hand position and twisting motion that can be performed anywhere, even while holding a package in one hand. Once mastered, you will never need to search for scissors again when sealing or opening packages.
For more practical life hacks, check out our guide on how to peel garlic easily without special tools and our article on rearview mirror repair.
Based on different methods and different tapes, the reasons for failing may vary. This video shows you the precise steps and conditions to succeed. You may feel frustrated, but do not give up — watch and find your technique.
Method One: Fingernail Edge Technique
This is the method Dr. Zhang invented himself, and he considers it better than any other method. It works on 2-inch tape, 3-inch tape, and even duct tape. The one exception is super-strong tape reinforced with fiber — that one won’t work here. Fair warning: you’ll probably need to watch it about four times before the skill clicks.
There are four points you must keep in mind simultaneously.
One: sink your fingernail into the outermost edge of the roll. Not the center, not close to the edge — the very edge. Half your nail should be visible on the empty side of the roll. You can cut either side of the tape, but the nail must be pressed right against that outermost edge. A marker line helps you align it precisely.
Two: pull up at an angle away from the roll. If your nail is on the near side, pull toward you; if it’s on the far side, pull away from you. Do not pull sideways in either direction — that stretches the tape, makes it narrower, and makes tearing much harder.
Three: establish initial tension without over-stretching. Before the quick pull, the tape should already be under tension but not yet strained.
Four: pull quickly. You can use four fingers for extra strength. One common mistake is jerking in the opposite direction first — that destroys your initial tension state and the tear won’t happen. All four points must be satisfied together: outermost edge, correct angle, initial tension, pull quickly.
If you move your two hands closer together, that also helps when fingernails are short or the tape is particularly thick.
Method Two: Two-Thumb Scissors
Place one thumb on the edge of one side of the tape, and the other thumb on the edge of the other side. Then twist them against each other as if your thumbs are a pair of scissors. The same four-point framework applies here.
The key distinction is the type of force: you need to apply shear stress, not a stretch or a pull-apart. The force must be perpendicular to the tape, there must be zero gap between your fingers, and the motion must be quick. Keeping your fingers closer than one millimeter apart is especially critical.
If your index finger is very strong, you can substitute one thumb and one index finger, but thumbs are generally stronger and more reliable. The main advantage of this method is that it lets you break off a very small piece of tape cleanly. The tradeoff is that it demands stronger fingers than Method One.
Method Three: Violent Fold-and-Pull
This one requires no skill at all. Fold the sticky side of the tape back on itself so that the two adhesive surfaces bond together, then pull them apart very quickly.
It tears 2-inch tape and duct tape with ease. The cut may not be as clean as the fingernail method produces, but it gets the job done. It does not work on 3-inch tape or the super-strong fiber-reinforced variety.
If the four-point techniques of the first two methods have been frustrating, this method will make you happy.
Method Four: Using Your Teeth
This one comes with a disclaimer: do not show it to your dentist, or do show it to someone you want to impress with your table manners — your call.
Fold the tape edge over slightly so you don’t contact the adhesive, then bite just a tiny bit on the edge. Even on a double layer of tape, your teeth can cut through it because tape is softer than steak. Once that tiny cut exists, you can tear the rest easily by hand from that initiation point.
It’s not as impressive as Methods One or Two, but it’s genuinely useful when no one is watching, or when impressing anyone simply isn’t on the agenda.
Method Five: Pre-Cut Preparation
Use a knife to score a small cut across the full roll in advance. After that, whenever you need a piece, you just tear it by hand — no tool required at the moment of use.
The obvious downside is that you are weakening the roll permanently. Even so, it’s practical in specific situations: hanging holiday decorations, labeling boxes, taping a note to a bulletin board. It can also help people with arthritis or very little hand strength.
Technically, yes, you did use a tool — but not at the time you actually needed the tape. That’s the distinction that makes it useful.
If you have basic sharp items nearby — car keys, a pencil — you can also use those to punch a starting hole in the tape, though you may get a ragged edge or an uneven tear. And if you do a lot of packing regularly, dedicated tape-cutting tools are available for a consistently clean cut.
Choosing the Right Method for Your Situation
There are so many different tape types and situations that no single method wins every time. The fingernail edge technique is the most versatile and the most impressive once mastered, working on 2-inch, 3-inch, and duct tape. The two-thumb scissors method shines when you need a very short piece. The violent fold-and-pull is the go-to when speed matters more than a clean edge. Teeth are the secret emergency backup. Pre-cutting is the quiet workhorse for repetitive light-duty tasks.
Experiment, find which technique suits your hands and your tape, and share it with anyone you know who has ever lost a fight with a roll of packing tape.