2 Ways To Fix Brass Anti-Siphon Sprinkler Valve Leak. Tips for Rebuild W/ Repair Kit or Replacement
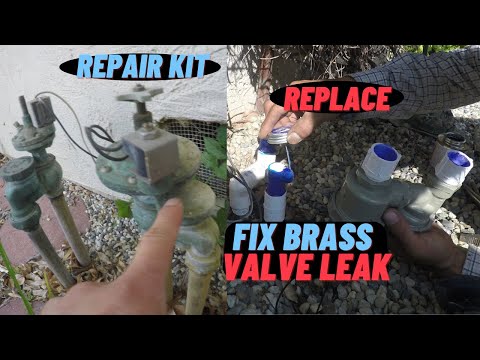
2 Ways To Fix a Brass Anti-Siphon Sprinkler Valve Leak
When a sprinkler head will not turn off and keeps leaking water, the problem is often inside the valve rather than at the sprinkler head itself. The diaphragm or gasket inside the valve may be damaged or debris may be preventing a proper seal. In this video, Dr. David Zhang demonstrates two approaches: rebuilding the existing brass valve or replacing it entirely with a new PVC valve.
Method 1: Rebuild
Rebuilding is cheaper and faster than replacement. It involves opening the valve, removing the old diaphragm and internal components, matching them with a rebuild kit, and reinstalling. Brass valves are more durable and resistant to cracking than plastic, making rebuild a good investment.
The video shows step by step how to disassemble the valve, match the washers, O-rings, and gaskets from the rebuild kit, and reassemble everything. Having the rebuild kit ready before opening the valve saves time.
Method 2: Replace
If the brass valve is too corroded or damaged to rebuild, replacement with a PVC valve is the alternative. The video covers the challenges of cutting brass pipe, matching pipe sizes with PVC couplers, using Teflon tape correctly on both metal and PVC threads, and properly cementing PVC fittings.
An important requirement: the new valve must be installed at least 6 inches higher than any sprinkler head it controls, as required by plumbing code for anti-siphon protection.
For more plumbing and home repair, check out how to do bathtub caulking and rearview mirror repair.
Understanding Anti-Siphon Valves
Anti-siphon valves serve a critical safety function in irrigation systems. They prevent contaminated water from being sucked back into the household water supply through back-siphonage, which can occur when water pressure drops suddenly. Building codes require these valves to be installed at least 6 inches above the highest sprinkler head they control.
Brass anti-siphon valves are preferred over plastic in many situations because brass resists chemical degradation, withstands UV exposure better than plastic, and is less susceptible to cracking from temperature changes. However, the internal rubber components (diaphragms, gaskets, and O-rings) wear out over time regardless of the valve body material.
Rebuild Kit Details
A rebuild kit typically costs between $8 and $15 and includes all the replaceable rubber components: the main diaphragm, bonnet washer, and O-rings. Having the kit ready before opening the valve is essential because once disassembled, the old gaskets may not seal properly when reinstalled.
The matching process is important because rebuild kits often include parts for multiple valve models. Dr. Zhang shows how to compare each piece from the kit against the original components to ensure correct sizing. Installing an incorrectly sized O-ring or diaphragm will result in continued leaking.
PVC Replacement Considerations
When replacing a brass valve with PVC, the transition between metal and plastic piping requires careful attention. Teflon tape application differs between metal-to-metal and metal-to-PVC connections. PVC cement creates permanent bonds, so dry-fitting everything first ensures correct alignment before committing.
The most common challenge when replacing a brass valve with PVC is matching the pipe sizes. Adapters and couplers are available for most common sizes, but measuring carefully before purchasing supplies prevents multiple trips to the hardware store.
Long-Term Maintenance
After repair or replacement, test the valve by running each zone and checking for leaks both at the valve and at the sprinkler heads. Mark the date of repair so you can track the valve’s lifespan and anticipate future maintenance needs.