How To Remove Front Bumper Saving $200
How To Remove Front Bumper Saving $200
Key Takeaways
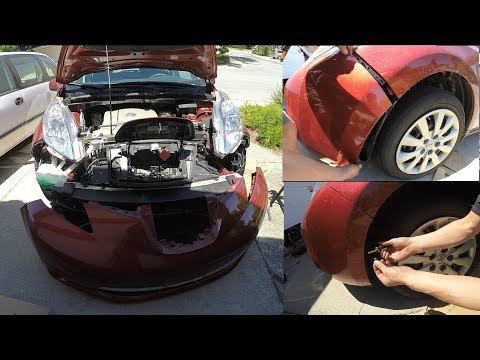
- Today I am going to show you how to remove this front bumper
- Originally this was part of my auto body video, check out that video if you are interested in fixing an auto body puncture
- If you want to paint the panel, check out this video: This video will save you money
- The body shop quoted 2 hours’ labor to remove the front bumper, but you can remove the bumper yourself, and then take it to the body shop for them to fix the puncture, thus at the minimum we have shown that you can save $200 on labor costs
- My example here is a Nissan Leaf 2015
Understanding the Basics
Modern car bumpers consist of two main parts: the bumper reinforcement bar (a metal beam behind the cover) and the bumper cover (the visible plastic piece). When people talk about removing a ‘bumper,’ they usually mean the cover. The cover is attached with a mix of plastic push clips along the top, Phillips screws along the bottom, and bolts or clips at the fender junction. The exact locations and fastener types vary by vehicle make and model, but the general approach is the same.
The DIY Advantage
Body shops charge $150 to $400 in labor alone to remove and reinstall a bumper cover. If you are replacing the cover due to damage, the labor often costs more than the part itself. Doing it yourself turns a $500+ repair into a $100 to $200 parts-only expense.
Tips for Best Results
Take photos of every clip and fastener location before removal so you remember where everything goes during reinstallation. Work carefully around the headlight area where the bumper cover connects to the fender — these clips break easily if you pry too aggressively. Keep all removed fasteners in a labeled container. If any plastic push clips break during removal (which is common), buy replacements ahead of time from an auto parts store.
Video Chapter Guide
Here is a quick reference for the key sections covered in the video:
- 0:00 save $200 on labor costs
- 0:42 do it less than 1 hour if someone showed me
- 1:03 step 1: remove black cover
- 1:23 step2: remove 4 plastic clips ; step 3: remove charge port
- 1:47 step 4: unfasten center of bumper
- 2:08 step 5: remove 2 screws
- 2:28 step 7: unfasten bottom of bumper ; step 8: unscrew unfasten bumper from panel
- 2:50 step 9: pull many tabs
- 3:48 put the bumper back
Use these timestamps to jump directly to the section most relevant to your situation.
More Practical Guides
Bumper removal and reinstallation is a great entry-level body work skill that opens the door to many other repairs you might otherwise pay a shop to handle.
For more hands-on tutorials, check out our guides on changing transmission fluid and replacing front brake pads. Each one follows the same practical, no-nonsense approach to help you save money and build useful skills.