Kenmore Electrical Dryer motor OK but No heat
Kenmore Electrical Dryer: Motor Runs But No Heat — How to Diagnose and Fix
Key Takeaways
- When a Kenmore electrical dryer motor runs but produces no heat, the most likely culprit is a broken heating coil
- Before troubleshooting the dryer, test the power outlet to confirm you have full 220-volt power across all three terminals
- A broken heating coil can be temporarily reconnected, but replacement is the proper long-term fix
- Shorter coil length after repair means less resistance, which means slightly higher current — monitor this carefully
- The connection must be tight to avoid gaps that could produce sparks
Diagnosing the No-Heat Problem
If your Kenmore electrical dryer tumbles clothes just fine but never gets warm, the motor is clearly working. The problem lies somewhere in the heating circuit. This video walks through the systematic diagnosis process, starting from the power outlet and working through to the heating element itself.
Step 1: Check the Power Outlet
Electric dryers run on 220 volts, delivered through a three-prong (or four-prong on newer installations) outlet. The outlet has three terminals, and you need to verify voltage between each pair:
- Between the two hot terminals: should read approximately 220 volts
- Between each hot terminal and the neutral: should read approximately 110 volts each
If one of the hot legs is dead, you will get 110 volts at the outlet but not 220. The motor will run (it only needs 110V) but the heating element will not activate (it needs the full 220V). Check your circuit breaker panel — dryers typically have a double-pole breaker, and sometimes only one side trips.
Step 2: Trace the Wiring
After confirming the outlet is providing full power, follow the wiring from the power cord into the dryer. Check the terminal block where the cord connects to the dryer’s internal wiring. Look for any burned, loose, or corroded connections.
Step 3: Inspect the Heating Coil
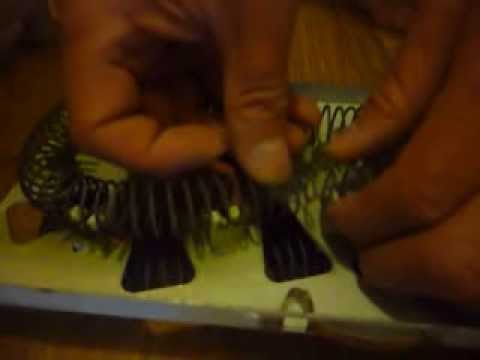
On this particular Kenmore model, the back panel cannot be removed to access the heating element — you need to approach it from a different angle. The heating coil is a long, coiled resistance wire that glows red-hot when current flows through it. Over time, these coils can break from thermal cycling, vibration, or age.
In this dryer, the heating coil had a visible break. When the coil breaks, the circuit is open and no current flows through the element, which means no heat.
The Temporary Fix: Reconnecting the Broken Coil
If you find a break in the heating coil, there is a temporary fix that can get your dryer running again while you source a replacement coil:
- Locate the break in the coil
- Use a small bolt and nut to clamp the broken ends together
- Ensure the connection is tight — gaps between the wire ends can create sparking, which is a fire hazard
- Choose hardware carefully — the bolt and nut must be small enough that they do not contact the dryer housing and cause a short to ground
Understanding the Trade-Off
When you reconnect a broken coil, the repaired section effectively shortens the total coil length. A shorter coil means less electrical resistance, which means the coil draws slightly more current than it was designed for. How much more depends on how much coil length you lost in the repair.
For a small break where you lose only a tiny amount of wire, the current increase is negligible. But if you have had multiple breaks and reconnections, the cumulative shortening could become a concern. The coil will run slightly hotter and draw more power, which could stress other components or potentially trip your breaker.
This is why I consider the bolt-and-nut method a temporary fix. The ultimate solution is to replace the heating coil entirely with a new one that has the correct resistance and length.
Replacing the Heating Coil
Replacement heating coils for Kenmore dryers are available at appliance parts stores and online. To order the correct part:
- Find your dryer’s model number (usually on a label inside the door or on the back panel)
- Search for the heating element assembly using that model number
- Compare the new coil to the old one to verify it is the same dimensions and resistance rating
Installation is essentially the reverse of removal. Disconnect the dryer from power, remove the necessary panels, swap the old coil for the new one, reassemble, and test.
Safety Warnings
Working on electric dryers involves 220-volt power, which is dangerous. Always:
- Unplug the dryer before opening any panels or touching any internal components
- Never operate a dryer with panels removed — the exposed heating element is a burn and fire hazard
- Do not bypass thermal fuses or safety switches — they exist to prevent fires
- If you are not comfortable with electrical work, call a qualified appliance repair technician
When to Just Replace the Dryer
If your dryer is old enough that the heating coil has broken from age, other components may be nearing the end of their life too. The drum bearings, belt, and thermostat all have finite lifespans. If repair costs start adding up, it may be more economical to replace the entire unit.
For more DIY appliance and home repair guides, check out our article on bathtub caulking or our guide to replacing galvanized pipe with copper.
Sources
- Dryer Not Heating — RepairClinic — accessed March 26, 2026
- Electric Dryer Troubleshooting — Sears Parts Direct — accessed March 26, 2026