video

The Fast Epoxy Resin Drying Surprise and Embarrassment, Lessons Learned

By Genius Asian Updated

Epoxy Resin Drying Surprise and Embarrassment: Lessons Learned

What This Video Shows

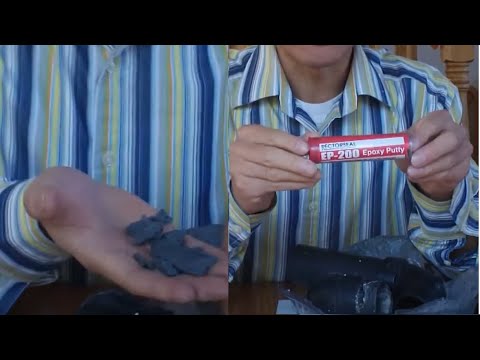
In this video I share my embarrassing experience with epoxy putty that caught me completely off guard. I had used two-part liquid epoxy glue before, where you mix two liquids and they harden over time. But epoxy putty is a completely different product with very different handling requirements, and the instructions on the package did not prepare me adequately. I needed to fix a leaking ABS pipe, and people at Home Depot recommended epoxy putty for the job. The instructions said to use within 2 to 3 minutes after mixing and that it sets hard in 15 to 20 minutes. But what exactly does mixing mean for putty? There is no liquid to pour and mix. The mixing for epoxy putty actually means kneading the putty between your fingers until the mixture becomes one uniform color throughout. And here is where the surprise hit me: as soon as I started kneading, the putty began generating significant heat through the exothermic chemical reaction. It got hot in my hands very quickly, much faster than I expected. And then within what felt like seconds, it hardened into a rock-solid lump before I could even apply it to the pipe. The entire putty was wasted because I did not understand that the working time starts the moment you begin kneading and that it is genuinely only two to three minutes before it becomes unworkable. I was frustrated and embarrassed, but I turned it into a learning experience. The lesson is clear: with epoxy putty, you must have everything prepared and ready before you start kneading, and you must work extremely fast once the kneading begins.

Why This Matters

DIY home repair and creative problem-solving save money and build practical skills that serve you for a lifetime. Every project you complete yourself gives you more confidence to tackle the next one. And sharing these experiences through video helps others avoid the mistakes I made and benefit from the solutions I discovered.

Quick Tips

Safety first. Always disconnect power before working on electrical components and wear appropriate protective equipment.

Watch the full video before starting. Understanding the complete process prevents costly mistakes and wasted materials.

Do not be afraid to experiment. Some of the best solutions come from trying unconventional approaches.

For an in-depth repair guide on this topic, see the detailed article on handymanfix.com.

Additional Thoughts

Beyond what I show directly in the video, there are several additional points worth considering. The techniques and approaches I demonstrate are based on my personal experience and may need adaptation for your specific situation. Every project has unique variables that require critical thinking and flexibility. I always encourage viewers to supplement my videos with their own research, as conditions change and new methods may improve upon what I showed. Practice and patience are essential. Do not expect perfection on your first attempt. The learning process itself has tremendous value, and each try brings you closer to mastery. I have been doing projects like this for many years and I still learn new things every time, which is part of what makes these activities so rewarding and fulfilling. If you found this helpful, please share it with others who might benefit, and leave your questions and feedback in the comments. I read every comment and do my best to respond. Thank you for watching.

Watch on YouTube →