Hardwood Floor --part 4: How to Stair and Handrail (spiral curved)
Hardwood Floor Part 4: How to Install Hardwood Stairs and a Curved Spiral Handrail
This is the most ambitious part of our hardwood floor series. If you have followed along through preparation, installation, and trim work, your floors and walls are looking great. Now Dr. Zhang takes on the ultimate challenge: replacing carpet-covered stairs and steel spiral railings with solid hardwood treads and custom laminated curved handrails. A curved staircase is significantly more difficult than a straight one, but the finished result is stunning.
Key Takeaways
- Do not remove old steel railings until you have used them as a mold to shape your new laminated wood handrail
- Build the new handrail by gluing seven thin wood layers (laminations) together and clamping them to the old railing’s curve
- You have only a few minutes of working time before the glue sets, so have all your clamps ready before you start
- Use two types of hardwood planks for stairs: regular planks for risers and nosing planks with a rounded front edge for treads
- Check your local building codes for baluster spacing requirements — typically no more than 4 inches apart so a child’s head cannot fit through
- Recruit helpers for the final handrail and baluster assembly — this is not a one-person job
The Big Picture: Sequence of Work
The process has a specific order that might seem counterintuitive at first. You build the new handrail before you tear anything apart. Here is why: the old steel railing is the perfect template for shaping your new curved wood railing. Once you remove it, that template is gone. So the sequence is:
- Build the laminated handrail using the old steel railing as a form
- Remove the new handrail from the old railing
- Remove the old steel railing and carpet
- Install new hardwood stair treads and risers
- Install balusters and attach the finished handrail
Building a Curved Laminated Handrail
This is the most impressive part of the entire project. A solid piece of wood cannot bend around a spiral curve, but thin strips of wood can. By gluing multiple thin layers together while they are bent around the curve, the finished laminated rail holds that shape permanently.
Preparing the Laminations
Dr. Zhang uses seven thin layers of hardwood. Each strip is thin enough to flex and follow the curve of the spiral staircase without cracking. The exact thickness depends on the tightness of your curve — tighter spirals need thinner strips. Cut all seven strips to the full length of the railing before you start gluing, because once the glue goes on, the clock is ticking.
The Gluing Process
Apply wood glue to every surface between the seven layers. You need full coverage — any dry spots will create weak points in the finished rail. Stack the layers together, wipe off excess glue that squeezes out, and wrap masking tape or blue tape around the stack about every two feet. The tape is a temporary hold while you get the assembly onto the old railing.
Clamping to the Old Railing
This is the critical step, and you need to work fast. The wood glue gives you only a few minutes of working time before it starts to set. Press the glued lamination stack against the old steel railing, following its curve exactly. Apply clamps every few inches to hold the wood tight against the steel.
If you do not have enough clamps (and you probably will not — you need a lot), Dr. Zhang has a clever solution. Cut small square horseshoe-shaped brackets from scrap wood. These brackets wrap around the railing and the lamination stack, providing clamping pressure without requiring an actual clamp. Make these in advance so they are ready when you need them.
Once everything is clamped, leave it for 24 hours to allow the glue to fully cure. Do not rush this step. After the glue is dry, remove the clamps and the new curved rail will hold its shape permanently.
Removing the Old Staircase Components
With your new handrail built and cured, carefully remove it from the old steel railing and set it aside. Now you can demolish the old staircase components:
- Remove the old steel handrail and balusters
- Pull up the carpet from each stair tread
- Remove any carpet padding and tack strips
- Clean the stair stringers (the structural side pieces) and treads down to bare wood
You are not removing the structural stair framing — just the surface materials. The new hardwood will overlay the existing stair structure.
Installing Hardwood Stair Treads and Risers
Dr. Zhang uses two types of hardwood planks for the stairs:
Regular Planks for Risers
The vertical face of each step (the riser) is covered with the same regular hardwood planks used for the floors. Cut them to fit the width and height of each riser. On a straight staircase, these are simple rectangular cuts.
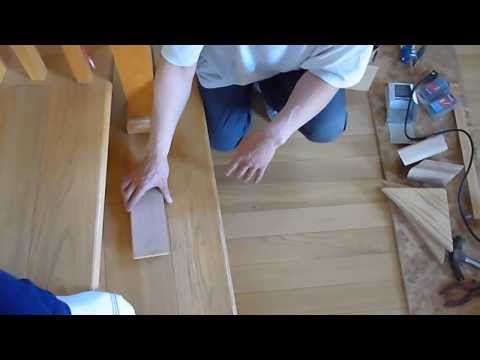
Nosing Planks for Treads
The horizontal surface you step on (the tread) uses a special plank with a rounded front edge called a “nose.” This nosing extends slightly past the riser below, creating the classic stair tread profile. The rounded edge is both comfortable underfoot and visually appealing.
Handling Curves and Angles
On a curved staircase, the bottom step and any turning points present unique challenges. The bottom step in Dr. Zhang’s staircase has a rounded edge that cannot be cut from a single piece of nosing material. His solution: cut the nosing into pie-shaped sections, piece them together like a puzzle, glue them, and then use a belt sander to smooth everything into a seamless curved surface. Once sanded, it looks like one continuous piece.
For 45-degree angles where stairs change direction, use a miter saw set to 45 degrees to cut clean angle joints. These are much more straightforward than the curved sections.
Fastening
Attach treads and risers to the stringer frames using a combination of trim screws and finish nails. Face-nail the treads since the nail heads will be barely visible on a horizontal surface that people are stepping on. The hardwood overlay simply covers the old stair surface, so you are screwing and nailing into solid wood beneath.
Installing Balusters and the Handrail
This is the final assembly, and it requires careful measurement, patience, and extra hands.
Baluster Spacing and Building Codes
Before you start, check your local building codes for baluster spacing requirements. In most jurisdictions, balusters must be spaced no more than 4 inches apart — close enough that a child’s head cannot fit between them. Dr. Zhang’s staircase uses 6-inch spacing per the guidelines in his area, but your code may differ. Getting this wrong can create a safety hazard and a code violation, so verify before you drill.
Drilling and Placing Balusters
For each baluster, drill a hole in the stair tread (bottom) and in the handrail (top) using a drill with a wide bit that matches the baluster diameter. Measure the height and angle of each baluster carefully — on a curved staircase, every baluster is a slightly different length and angle. Measure multiple times before drilling because a misplaced hole is difficult to fix.
Dry-fit a few balusters first to verify your measurements. Place them in the bottom holes, hold the handrail above, and check that everything lines up before committing with glue.
The Final Assembly
This step requires at least two or three helpers. Apply glue to the baluster ends, insert them into the bottom holes in the stair treads, then lift the handrail and fit it over all the baluster tops simultaneously. This is why you need extra hands — someone holds the balusters upright while others position the railing.
Work quickly before the glue dries, but do not panic. Dr. Zhang notes that on a curved staircase, small imperfections are virtually invisible because the eye cannot track a perfect curve anyway. Once everything is set and the glue has dried, the result is a beautiful custom handrail that follows the curve of your staircase perfectly.
Straight Staircases Are Easier
If your staircase is straight rather than curved, the same principles apply but with far less complexity. You will use straight pieces of wood for the handrail instead of laminated curves, and all your treads and risers will be simple rectangular cuts. The baluster work is also more straightforward because every baluster is the same length and angle.
The Finished Product
Step back and look at what you have accomplished: a complete hardwood staircase with custom treads, risers, and a hand-laminated curved railing, all matching the hardwood floors throughout your home. It is one of the most visually impressive DIY projects you can take on, and Dr. Zhang’s finished stairs are proof that a dedicated homeowner can achieve professional-quality results.
For more home improvement projects, check out our guide on replacing galvanized pipes with copper — another project that makes a dramatic difference in your home.
Sources
- Original video on Genius Asian YouTube channel — full video demonstration and walkthrough.
- YouTube Help, Channel Monetization Policies — YouTube content guidelines for home improvement tutorials.