Honda Accord -- How to bleed the brake fluid
Honda Accord: How to Bleed Brake Fluid the DIY Way
Key Takeaways
- Bleeding brake fluid on a 2004 Honda Accord (and similar Honda models) is a two-person job that requires patience and communication
- You can use a repurposed baby nasal aspirator (bulb syringe) to remove old fluid from the reservoir — a clever, zero-cost tool
- Dark, dirty brake fluid should be replaced with clean, clear fluid for proper braking performance
- The bleeding sequence matters for older cars (start farthest from master cylinder) but may not matter much for modern cars with ABS
- Always make sure no air enters the brake lines during the bleeding process
Why Bleed Your Brake Fluid?
Brake fluid is hygroscopic, meaning it absorbs moisture from the air over time. As moisture accumulates, the fluid’s boiling point drops and its color darkens from clear amber to a murky brown or black. Old, contaminated brake fluid can reduce braking effectiveness and eventually corrode internal brake components.
If you look at your brake fluid reservoir and the fluid looks dark and dirty compared to fresh fluid (which is clear and light-colored), it is time for a fluid change. This video demonstrates the process on a 2004 Honda Accord, but the technique works for most Honda models and many other vehicles as well.
Tools and Materials
Here is what you need — and one of these items might surprise you:
- Fresh brake fluid — use the type specified in your owner’s manual (typically DOT 3 or DOT 4 for Honda Accords)
- Baby nasal aspirator (bulb syringe) — this is the secret weapon for removing old fluid from the reservoir without making a mess
- Clear vinyl tubing — fits snugly over the bleeder valve nipple
- Small container — to catch the old fluid
- Box wrench or line wrench — to open and close the bleeder valves (typically 8mm or 10mm for Honda)
- A helper — this is a two-person job
The baby nasal aspirator trick is one of my favorites. When the kids were little, we used these to clear their noses. Now it has a second life as a brake fluid extractor. It fits right into the reservoir and lets you suction out the old, dirty fluid before adding fresh fluid.
The Two-Person Bleeding Process
Bleeding brakes requires two people because you have two conflicting goals that share the same pathway: you need to push old fluid out through the bleeder valve while simultaneously preventing air from entering the system.
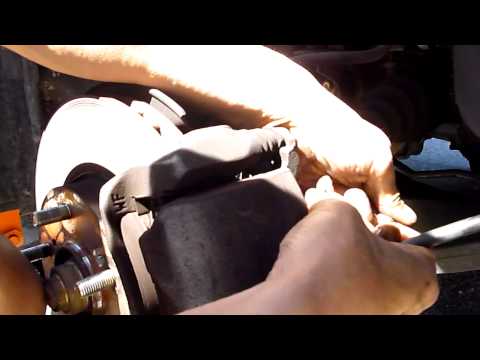
Step 1: Remove Old Fluid From the Reservoir
Use the bulb syringe to suction as much old fluid out of the brake fluid reservoir as possible. Then fill the reservoir with fresh, clean brake fluid. This ensures that the fluid being pushed through the system is clean from the start.
Step 2: Start Bleeding
One person sits in the driver’s seat and operates the brake pedal. The other person works at the wheel, opening and closing the bleeder valve:
- Helper at the pedal: Pump the brake pedal several times, then hold it firmly down
- Person at the wheel: Open the bleeder valve — old fluid (and possibly air bubbles) will flow out through the tubing
- Person at the wheel: Close the bleeder valve
- Helper at the pedal: Release the brake pedal
- Repeat until the fluid coming out is clean and clear with no air bubbles
Communication is critical. The person at the pedal must not release it until the bleeder valve is closed. If the valve is open when the pedal comes up, air gets sucked back into the line, and you have to start over.
Step 3: Check the Reservoir Frequently
Between each wheel, check the brake fluid reservoir and top it off with fresh fluid. Never let the reservoir run dry during the bleeding process — if it empties, air enters the master cylinder, and you will have a much bigger job on your hands.
Bleeding Sequence: Does Order Matter?
For older vehicles, the traditional recommendation is to start with the wheel farthest from the master cylinder and work your way closer. On most cars, that order is: right rear, left rear, right front, left front.
However, for modern cars with ABS (anti-lock braking systems) and separate brake circuits, the sequence may not matter as much. Some mechanics suggest starting with the front driver’s side and working around. Honestly, if you experiment, you may find it makes little practical difference on a modern Honda. The important thing is to bleed all four wheels until the fluid runs clean.
One-Person Alternative
If you do not have a helper available, you can still bleed brakes by yourself, but you need to be creative. Depress the brake pedal and wedge something (like a block of wood) against it to hold it down. Then go to the wheel and open the bleeder valve. This method works but is slower and more awkward. A two-person approach is always preferred.
After Bleeding: Test Your Brakes
Once all four corners are bled and the reservoir is topped off to the proper level, start the engine and press the brake pedal. It should feel firm and solid. If the pedal feels spongy or sinks slowly to the floor, there is still air in the system and you need to bleed again.
Take a slow test drive in a safe area before driving in traffic. Test the brakes at low speed to confirm they are responsive and the pedal feel is normal.
For more Honda Accord maintenance, check out our guide on how to turn off the maintenance light. If you are working on other brake projects, our Dodge Caravan front brake pad replacement guide covers another straightforward brake job.
Sources
- Brake Fluid Flush — Honda Owners — accessed March 26, 2026
- How to Bleed Brakes — AutoZone — accessed March 26, 2026